I’ve complained about Unity before. Every time I have approached it, even after years of being a professional software developer, it just did not click for me. Working as a contractor and helping run a contracting software agency, I’ve had to jump into dozens of languages, frameworks, platforms, or tools without knowing much about them. Typically I’ll fumble around with them for a few days or a week and get a rough idea about how to properly work with them. With Unity, the core ideas just never stuck and this never worked.
Well I have no idea what exactly happened, but within the last month I feel like it clicked.
I’m guessing the biggest shift for me was trying to ignore the GUI at first and figure out how the code works. That’s where I feel most comfortable. I dug into the Unity docs, watched more YouTube videos than I’d like to admit, and now feel comfortable enough to be dangerous. Realistically I’m sure I understand less than 5% of the system since it’s massive, but I’ve honed in on the core concepts as much as possible. A foundation to stand on is what I was looking for. This helped me escape tutorial-hell, googling every specific scenario. It brought me back to the days of freshman year of college.
For any non-games industry software devs or web devs feeling the same, I wanted to document some of the concepts I’ve worked through so far.
This is not meant to be a tutorial
Heads up, this is not meant to be a step by step tutorial. It’s really just a collection of tips, thoughts, and processes I’ve worked through along with some reference links to actual tutorials or documentation.
The component system
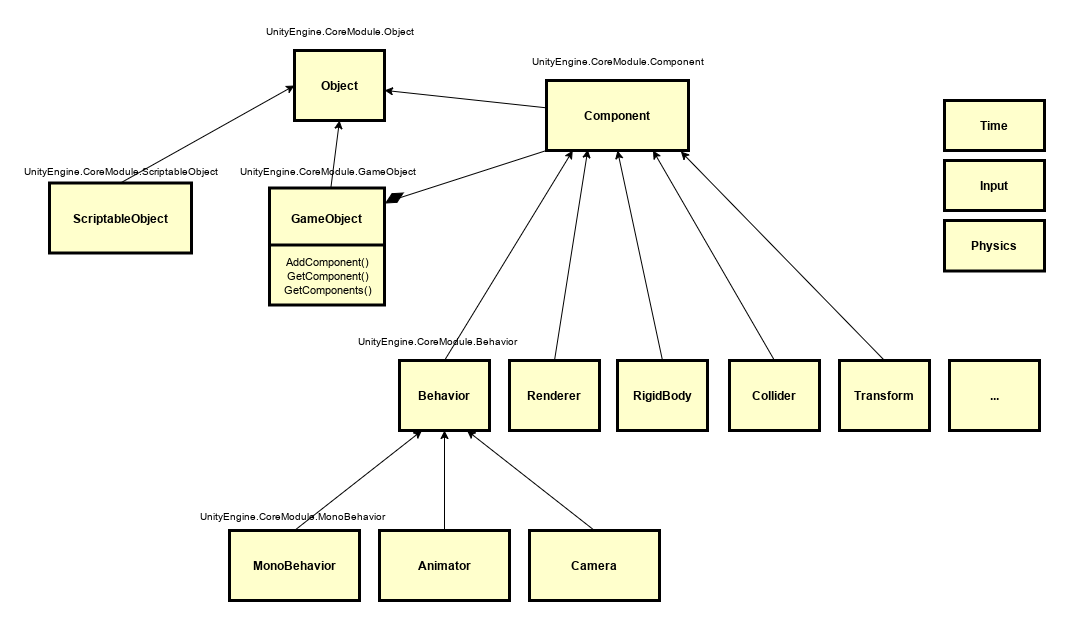
When first learning, I kept seeing references describe everything as a component. I didn’t take this literally at first because “component” is such a generalized word in software. Seeing a class diagram really helped me out though. This was the first big ah-ha moment with Unity.
Literally, most things inherit from the “Component” unity core class.
So when building a simple game, you are building or reusing Component’s, organizing them into containers of Component’s (GameObject’s), and then organizing GameObject’s together into scenes. I guess a scene could be thought of as a container of containers of components? But let’s not call it that please.
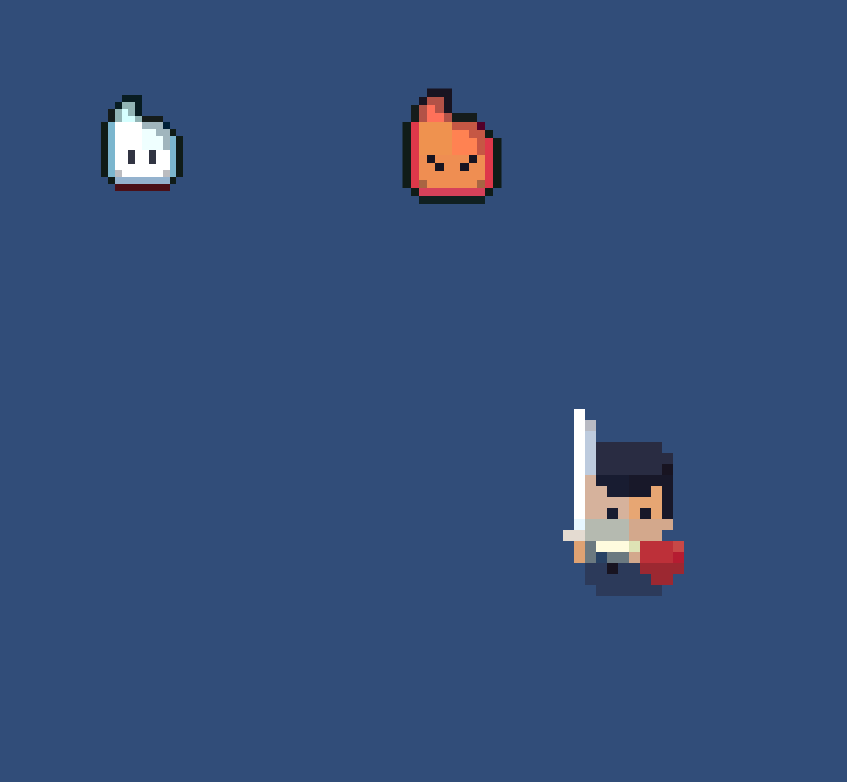
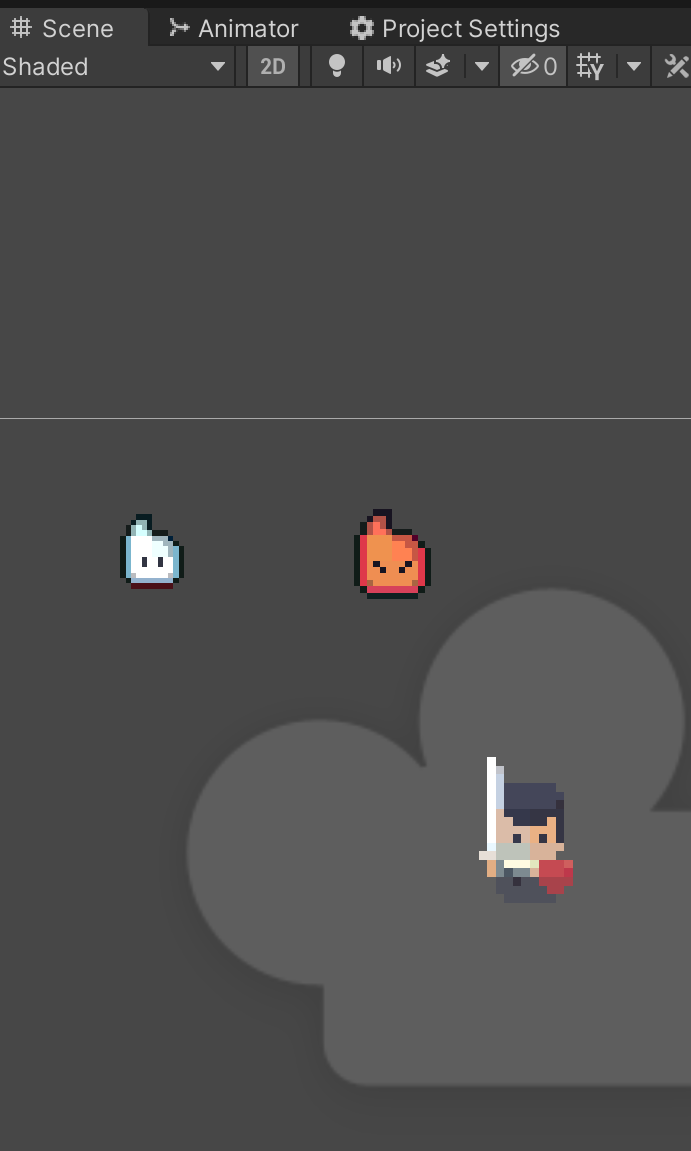
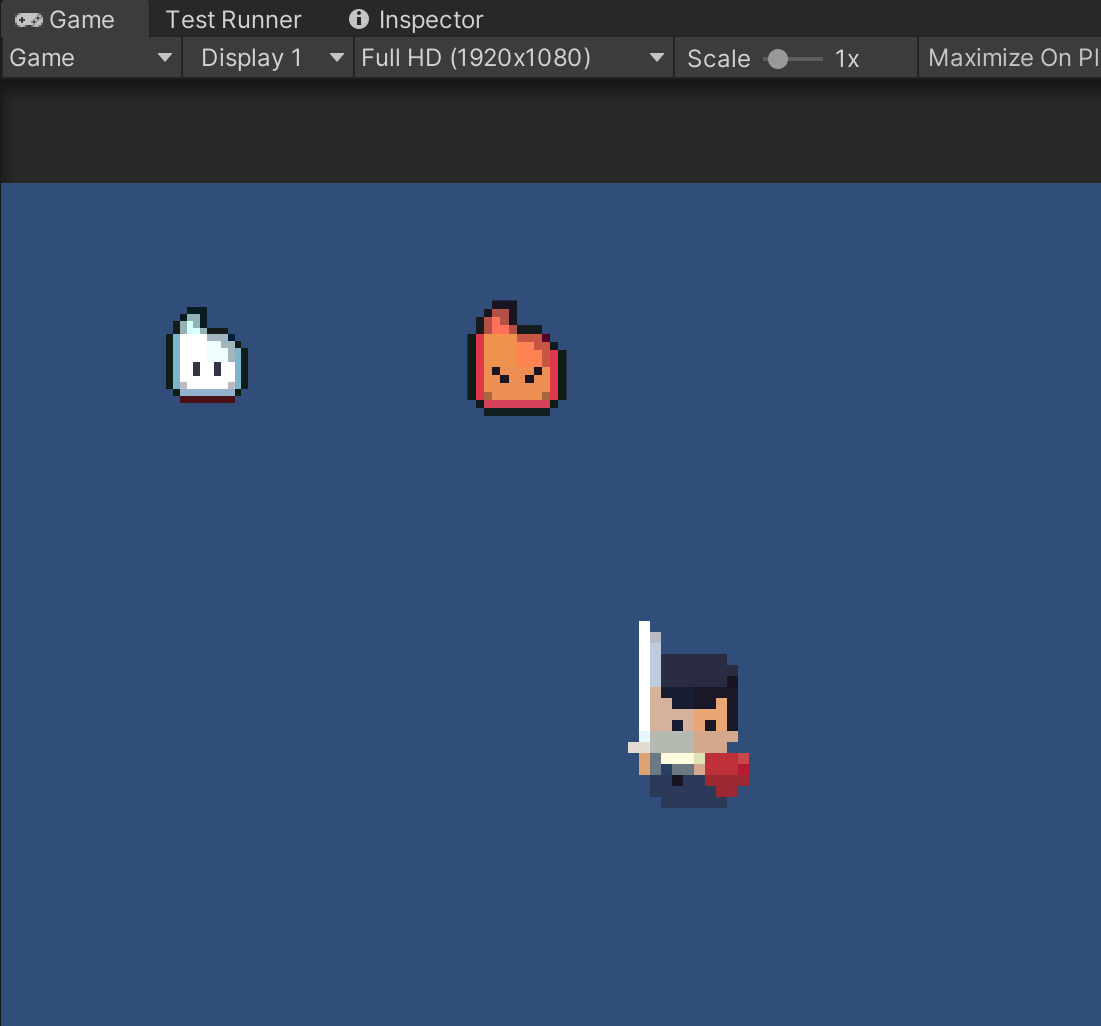
This changed my mindset. I started thinking in “components”. For example, I started to build a top down, 2d prototype where a character with a sword fights spirits flying at him:
I started breaking down existing Unity components that I could use, components that I needed to make, how those components are going to live together, and how those components are going to interact with each other. My thought process basically went:
I need a character to appear on the screen. What component is best to render a sprite to the screen? I researched and looked at the Unity Docs to find the SpriteRenderer component. So I added a game object called Player which contains a sprite renderer component.
Then I needed the player to move. Again, what component will allow a 2d sprite to move? I looked at docs again and didn’t see anything obvious, so I made a Movement component and added that to my Player. My Player game object now defers to two different components, one which tells it how to render a sprite and another for how to move that sprite around.
This is a simple example, but basically my process has stayed the same even as prototypes have gotten more complicated. I want to do XYZ. What component or components do I need to apply that functionality? What game objects are responsible for containing those components? What are the dependencies of the components? Do they need references to other components in the scene or on the same game object? etc.
MonoBehvaior’s are user defined components. Things you make to add functionality.
“Scripts” are C# files where you define custom code. Usually MonoBehavior, ScriptableObject, or vanilla C# code.
There are lots of reusable core components like Tranform, SpriteRenderer, Camera, RigidBody, etc.
The GUI
After wrapping my head around the component system, game objects, and organizing scenes/hierarchies, then the coding side of things got easier. I could get back into the groove of pulling up VSCode and writing code like any other software project.
Then I had to deal with the GUI side of things. How does the code and the Unity GUI fit together?
There’s so much packed into the GUI, but I’ve found myself staying withing a few sections of it most of the time:
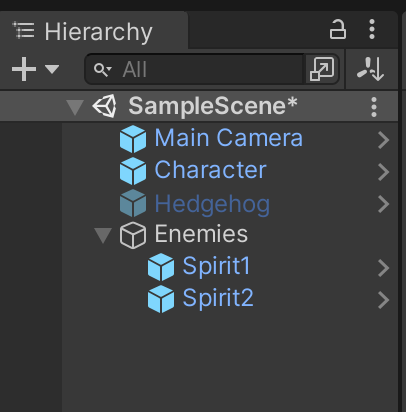
1. Scene Hierarchy
The current scene is represented as a tree of game objects. This is where I started to understand game objects related to each other. Why would you nest one game object inside of another? So far, I’ve seen two reasons. 1. They have a dependency on each other. Say some component may search for a game object called “SpriteModel” inside of the game object its attached to. And 2. For organization. I guess this can be a bit dangerous for performance reasons in larger projects, but personally with small prototypes I’ve been creating empty game objects to stay organized. For example, I may add an empty game object called “Enemies” and nest all enemy game objects underneath that.
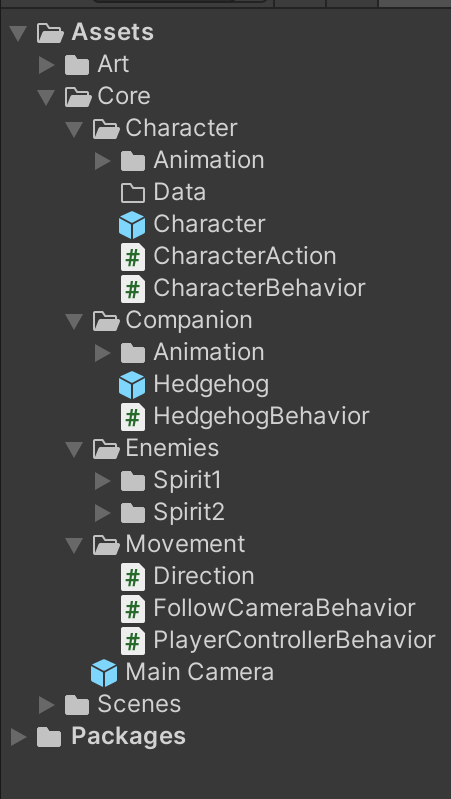
2. Project Hierarchy
A list of project files as well as some Unity specific elements. You may see things show up here that would not show up when you open up a file explorer. Prefabs for example, which are a way to save and reuse game object across multiple scenes, or a way to dynamically instantiate game objects. As far as I’m aware, the data for these types of elements are defined in .meta files.
If you don’t know where to get started with organizing these files (and don’t want put everything in one big folder), there’s plenty of methods out there. Reading code from other developers helps. In general, I try to break out common sense modules and keep everything related inside of it. A lot of people organize by type (all my behaviors in one folder, all my prefabs in one folder, all my animations in one folder, etc). It’s best to do whatever works and feels natural for you.
3. Scene
A visual representation of your game objects. Each game object renders differently. For example, a game object with a camera component shows a camera icon. A game object with a sprite renderer component will show the sprite like in above.
Each component is positioned at a certain place in the world based on their Transform component which is required on every game object.
4. Game
Then there’s the game tab. It’s the most straight forward section. When you run your game with the big Play button at the top, it runs the game in this window for you to play and test. At first, it’s as simple as that.
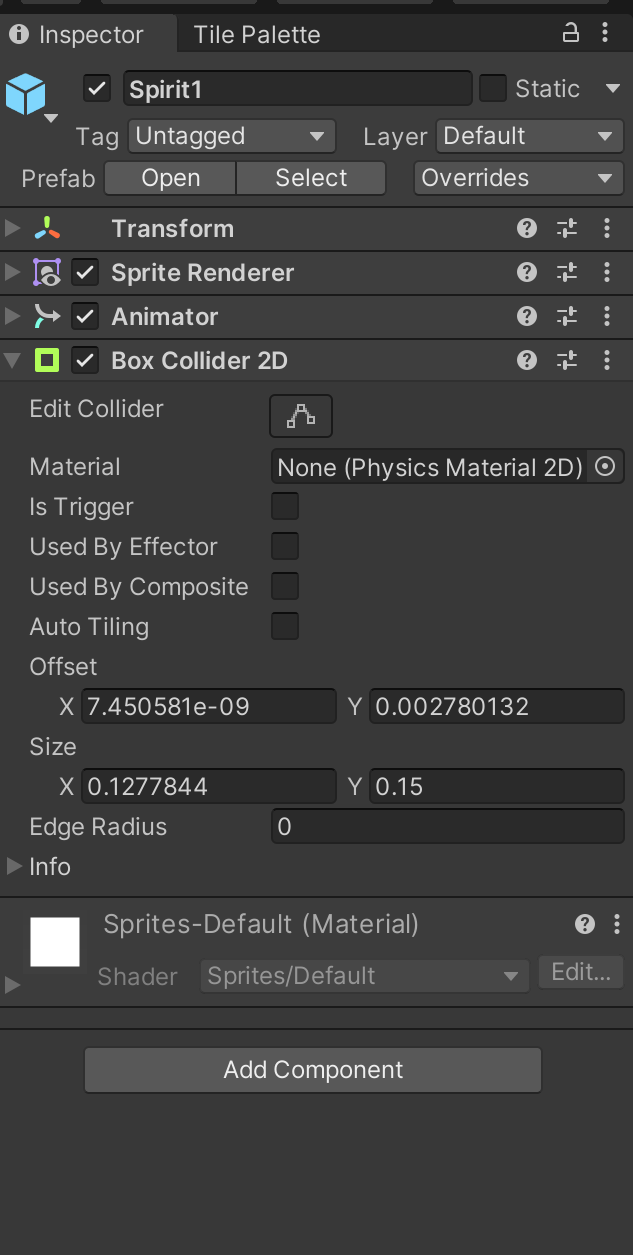
5. Inspector
Finally, the inspector. When clicking on a game object either in your scene or in your project the inspector will show you details about it. Remember that game objects are just collections of components, so it shows a dropdown section for each component attached to the gmae object.
Here is also where you can “glue” together any components you write with specific game objects. Wrote a PlayerMovementMonoBehavior? This is where you can add that PlayerMovement component to a game object.
In the example above it has 4 components:
Transform
Sprite Renderer
Animator
Box Collider 2D
There’s a lot more that can be done with the inspector, but at its core it’s a way to inspect game objects, change variables associated with those components, add new components, delete existing components, debug, etc.
Since Unity games are just large collections of components for the most part, each component has the ability to hook into events that fire at certain points in the lifecycle of the game. Every game runs in a loop. It keeps cycling through the same functions over and over, adjusting to changes in state triggered outside factors. This could be a user providing some input, time moving forward, etc.
Unity, with it being a game engine full of helpful utilities, also automatically does a bunch of things within its game loop. One of those being providing hooks for you as a developer, since you aren’t directly writing the game loop yourself.
When a Unity game starts up, it goes through the following steps:
Startup: the initialization of the system and components.
Updates: beginning of the game loop, with each iteration through the cycle being 1 frame.
Physics
Input event
Game logic
Scene rendering
Gizmos
GUI
End of frame
Pausing
Teardown: when application quit is triggered, enters Teardown.
The most common hooks I’ve run into so far are:
Awake: called once per application startup, before any Start function.
Start: called once before the first frame update.
FixedUpdate: used for the physics engine and is independent from the frame rate. Can be called multiple times per frame.
Update: called once per frame.
LateUpdate: called once per frame, after Update is done. Can be helpful is some calculation in Update needs to complete first.
OnDestroy: Called on the last frame before this object is destroyed.
OnApplicationQuit: Called on all components before the game shuts down.
When working in web dev, there’s a good amount of IO happening at any given moment. A web application may be taking in user input via the browser, but many applications are also dealing with server side IO. The application may be polling external services, constantly communicating with a data layer, using webhooks to handle events, running and communicating via websockets, etc.
With non networked, non multiplayer, simpler games, it seems that developers primarily need to worry controller input from the user though. This is one piece that feels much simpler than the web applications I’ve dealt with. Unity provides a couple of features for dealing with this type of input:
The Input class which is a facade for the `InputManager.
The “Input System” package introduces a couple of years ago for handling more complex input setups.
I’ve only focused on the input manager at this point and is fairly common sense. if Input.GetKey(...) then do something.
I’ve been working through quite a few concepts in game development in general, as well as Unity API specific features. There’s plenty more to talk about, but there’s more I want to learn before typing up more thoughts.
If you’re interested, here’s some of the other core concepts I’ve been working through:
Player movement mechanics, simple 2d physics.
2D camera and lighting techniques (using the URP).
Persistent data (save/load data management).
User interfaces.
Unity specific editor tools.
Dialog systems and translations.
I’ve been able to learn quite a bit through these resources. Check them out:
Figuring out if building a complete game as a solo game dev has a lot of components to it. It reminds me more of starting a business than a purely creative endeavor. Luckily I’ve had a lot of fun trying to start a few businesses. And by “few” I mean “more than I’ve like to admit to here”.
So far I’ve been focusing on three dimensions of work when it comes to building my own game:
The Technical Side (Programming, Game Development and Design).
The Business Side (Marketing, Promotion, Networking, Distribution, Budgeting, Forecasting).
The Art Side (Graphic Design, Game Assets Design).
For the technical side, I’ve been spending a lot of my time learning, building prototypes, and testing out different engines or tools. Since I’ve been developing software for a while, the technical side of things is starting to fall together pretty quickly. I see how to get from point A to point B, the concepts I would have to figure out along the way, the riskiest parts of a given project, etc.
I can also get a general feel for the “business” side. I’ve helped run a small software development agency and have also started a couple of small businesses on my own.
What I didn’t expect being the biggest hurdle is art.
How long would it take?
On a scale of 1-10, I probably fall somewhere around a 3 or 4 on art ability. I’ve always drawn a bit for fun or have learned small tricks from my dad who studied art. I liked to do charcoal drawings throughout high school and college for example, but getting a workflow going to generate the assets for an entire game is another story.
Based on the handful of assets I’ve worked on over the last few weeks, I think it would take 600+ hours for even a small game.
Maybe all of my ideas so far have too much scope considering my current ability. I’m working towards putting together a simple, complete game within a month or two of development so obviously spending 4-6 months full time on art isn’t going to work.
Looking at stock assets.
I’ve been using stock asset packs from the Unity assets store for prototyping, but if I’m trying to release an original game (even a small, simple one) I’d prefer to have unique assets.
Today’s work.
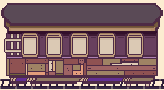
Now after spewing out all of my concerns, ironically today I’ve felt pretty productive with art. I’ve created designs around a puzzler prototype I’m working on and was able to kick out some pretty cool looking stuff in a few hours today. I’ve been using Aseprite to make pixel art.
Here’s a train sprite and animation I’ve worked on this afternoon:
So what’s next?
Two options basically:
Find an artist to work with.
Just keep practicing.
For now, since I’m still just having fun with game dev as a hobby, I’ll see how #2 goes. Wish me luck. :)
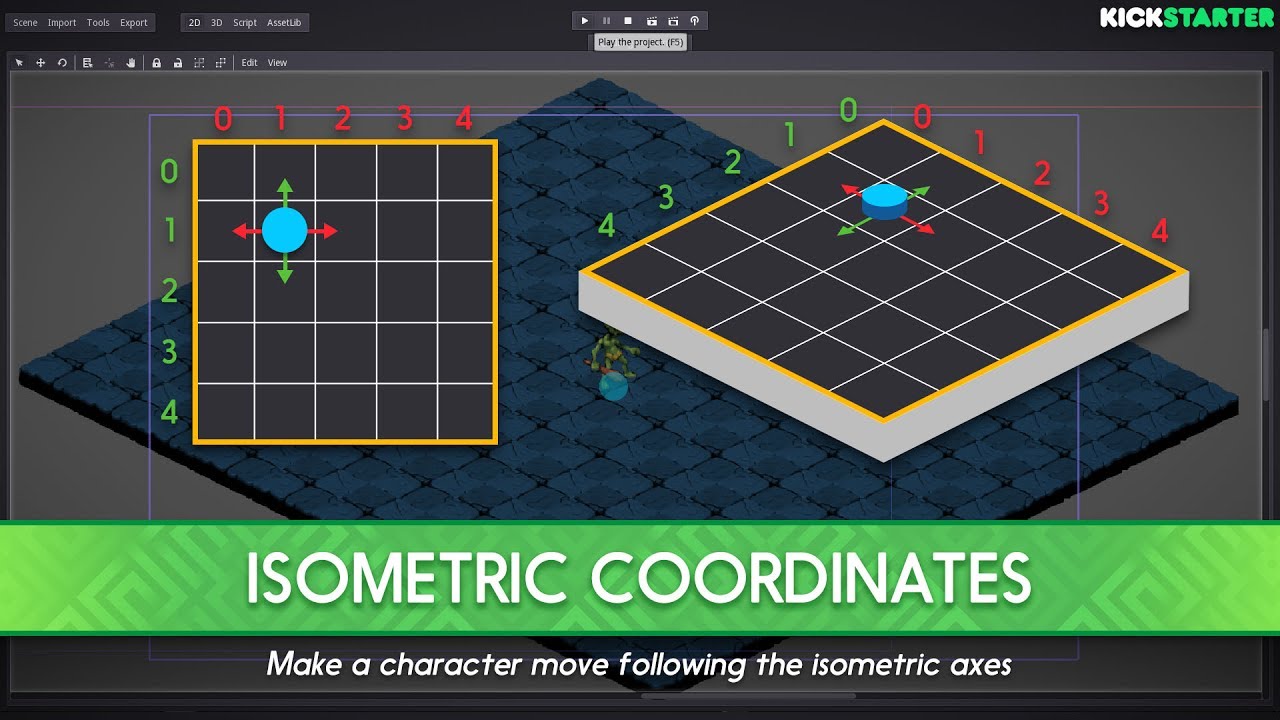
I’ve been playing around with different perspectives in games as I learn more, primarily top down, side scrolling, and isometric. Isometric naturally had the steepest learning curve, so I spent some time playing around with prototypes.
Isometric rendering is a technique used to create a 3D-ish looking games but in a 2D space (often called 2.5D). Where a traditional top down or side scrolling game would render in a tile grid where each tile is clearly a square or rectangle, isometric makes the tile appear as if the user is looking down at the map from 30 degrees up. This is acheived by shifting the dimensions of each tile so that they are twice as wide as they are tall.
Being a programmer without any serious design experience, pixel art was really attractive. I get that pixel art is not neccessarily easier to do very well, but I think the bar to entry is just lower. I ended up using Aseprite to make a couple of isometric tiles and then Tiled to build out a basic map.
Tiled exports the map definition to what they call tsx and tmx files, which at the end of the day are XML files defining the tileset, layers, and layouts of each layer.
A script for importing
I ran across PyTMX and I think I would use it in the future for projects, but decided to parse the Tiled exports myself for the sake of learning a bit more.
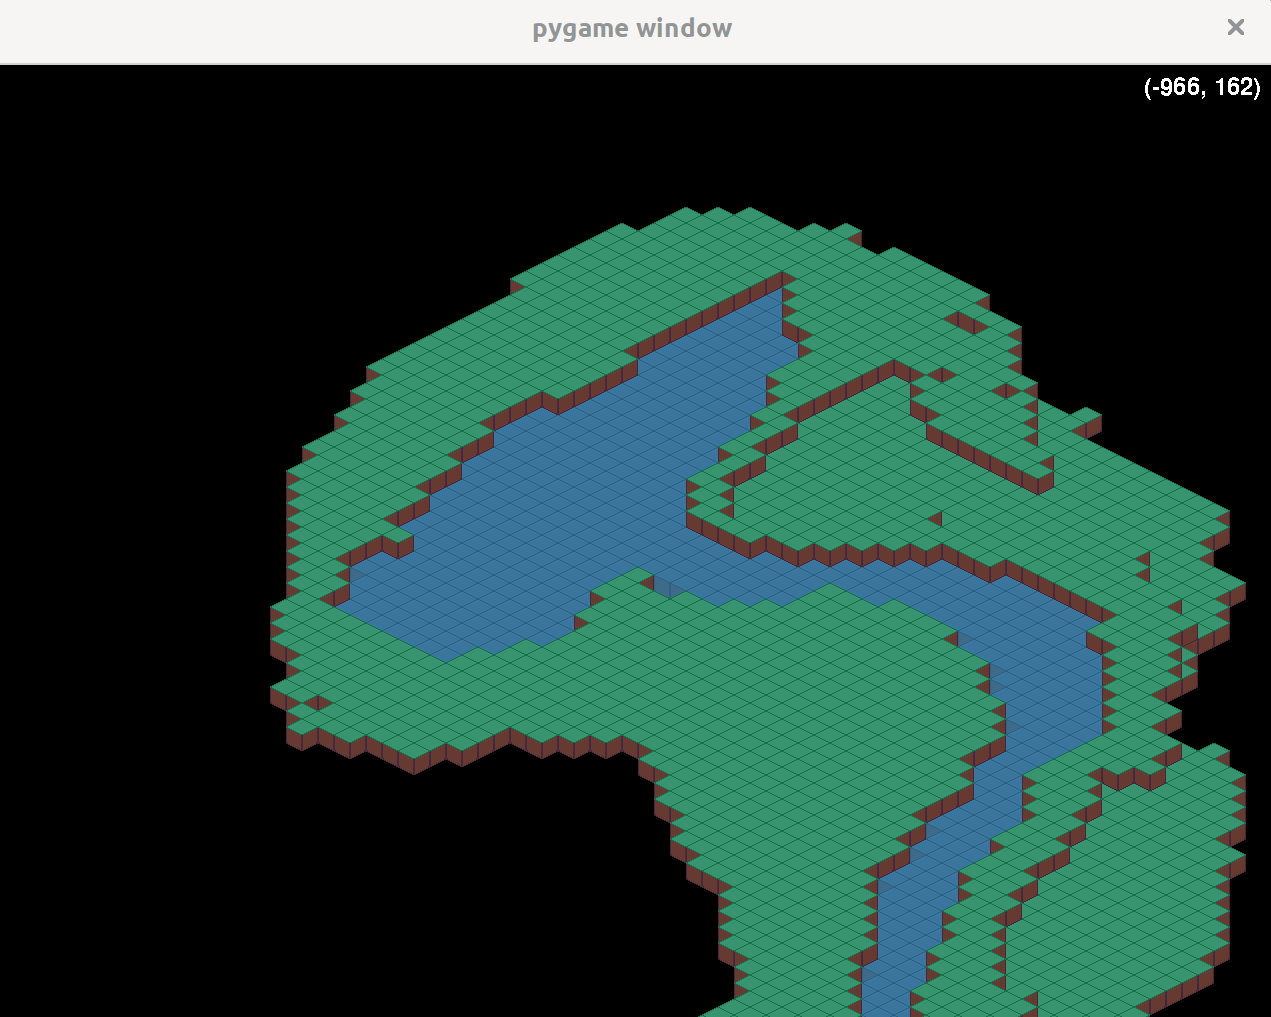
I started developing a little sample at https://github.com/holdenrehg-samples/sample_pygame_tiles first with an importer. I was able to depend on the builtin xml.etree module to parse out the sample files into a TileMap object which I defined.
After loading the tilemap data into a data structure that I could easily work with I created a World class and a Camera class. The idea was to initialize an entire world, but then have the Camera which only renders a slice of that world. Especially when dealing with pygame it’s easy to get into trouble with performance.
The World takes in the TileMap and then renders the game onto a pygame.Surface object given a certain Camera.
The World acts as the glue between TileMap and Camera.
defrender(self,screen:pygame.Surface,camera:Camera):forlayer_level,layerinenumerate(self.map.layers.values()):forcoordinates,tile_idinlayer.items():ifint(tile_id):# pixel specific x, y
x=coordinates[0]*self.map.tile_size[0]y=(coordinates[1]*self.map.tile_size[1])+(layer_level*self.map.tile_size[1])# tranformed x, y to account for isometric shape
x=(x-y)/2y=(x+y)/4ifcamera.in_focus((x,y)):screen.blit(self.map.tile_set[int(tile_id)],(x-camera.position[0],y-camera.position[1],),)
There are 3 transformation that are happening here. The rest of the code is just iterating through the data provided by Tiled and bliting to the screen.
Find pixel specific coordinates. The Tiled data references “tiles” instead of pixels. The x and y coordinates are converted to pixel coordinates by multiplying by the tile sizes.
Account for isometric shape. Each tile looks like a diamond on top, with the width 2x the size of the height. So imagine rendering those on a grid where you’ll see gaps in the corners of each piece and it will not give that 3d appearance. So we essentially rotate the entire map 90 degrees, flipping where the x/y axes lie by shifting each individual tile so that they overlap each other (down 25% and over 50%) to form a cohesive map.
Handle the camera. And finally we gotta adjust for the camera position.
Game loop
Time to tie it all together into a game loop. I’m going to initialize all of the components. This means the pygame lib, screen/display, camera, and tilemap.
importpygameimportpygame.displayimportpygame.eventimportpygame.fontimportpygame.imageimportpygame.keyfrompygrid_tilesimportimportsfrompygrid_tiles.cameraimportCamerafrompygrid_tiles.worldimportWorldASSETS_PATH="pygrid_tiles/demo"TILESET_PATH=f"{ASSETS_PATH}/ocean-tileset.tsx"TILEMAP_PATH=f"{ASSETS_PATH}/ocean.tmx"defmain():pygame.init()pygame.display.init()screen_w,screen_h=1280,960screen=pygame.display.set_mode((screen_w,screen_h))camera=Camera([0,0],[screen_w,screen_h])camera_momentum=6# Generate the game world...
# --------------------------
world=Nonewithopen(TILEMAP_PATH)asmap_file:world=World(imports.from_tiled(map_file,base_dir=ASSETS_PATH))# Run the game...
# ---------------
running=Truetry:whilerunning:screen.fill((0,0,0))foreventinpygame.event.get():ifevent.type==pygame.QUIT:running=Falseworld.render(screen,camera)pygame.display.flip()exceptpygame.error:passfinally:pygame.quit()raiseSystemExitmain()
For the sake of simplicity, I just created a main.py file in a demo folder so that I can run python pygrid_tiles/demo/main.py. That’s why I created a def main function and immediatley execute it at the end.
The first step in main is to initialize the pygame lib:
pygame.init()pygame.display.init()
Then I’m creating the display and camera. This is not the ideal way to handle the display because the size is completley fixed. This means not adapting to different resolutions or screen resizing for example. But it’s the simplest option for a quick prototype.
running=Truetry:whilerunning:# Set the background to black...
screen.fill((0,0,0))# Look for events fired from pygame...
foreventinpygame.event.get():ifevent.type==pygame.QUIT:running=False# Print the tilemap to the screen...
world.render(screen,camera)# Tell the display to update...
pygame.display.flip()exceptpygame.error:passfinally:pygame.quit()raiseSystemExit
User input and current position
Once the world was rendering the way I wanted, the last step was to get the camera to move adjust what’s displaying on screen. Hooking into the arrow keys was the simplest route. For example, when you press the right arrow key, the camera position should increment the x coordinate. Left arrow decrements x, up arrow decrements y, down arrow increments y.
To easily see what’s going on I also wanted to see the current position in the top right corner:
running=Truetry:whilerunning:...world.render(screen,camera)# Display current camera coordinates...
font=pygame.font.SysFont(None,36)text=font.render(f"({camera.position[0]}, {camera.position[1]})",False,(255,255,255))screen.blit(text,(camera.size[0]-text.get_rect().width-10,10))...
This involved creating a font variable, generating text with that font via font.render, and bliting that to the top of the screen (x=camera size - width of the text - 10px buffer, y=10px buffer).
Then handling the user input is fairly straight forward. We have all of our data stored and the map automatically handling changes to that tilemap and position data. So to move the camera, we just change the position attribute on our camera object.
try:whilerunning:...# Handle user input...
pressed_keys=pygame.key.get_pressed()ifpressed_keys[pygame.K_LEFT]:camera.position[0]=camera.position[0]-camera_momentumifpressed_keys[pygame.K_UP]:camera.position[1]=camera.position[1]-camera_momentumifpressed_keys[pygame.K_RIGHT]:camera.position[0]=camera.position[0]+camera_momentumifpressed_keys[pygame.K_DOWN]:camera.position[1]=camera.position[1]+camera_momentumworld.render(screen,camera)...
The camera_momentum is initially set to 6 so it will move 6px every frame as you hold down any of the arrow keys.
What’s next?
Building out this little prototype gave me a better idea about how to handle isometric rendering in games in general. I could see moving on to rendering sprites onto the screen, converting between isometric and cartesian coordinates, handling player movement, rendering additional layers of items on top of the world (items, enemies, landscape), etc.
I’m not sure if isometric makes sense for the types of games and prototypes I’m trying to build at the moment, but another tool in the toolbelt.
pygame doesn’t have a lot of the utilities included in other frameworks, so as I’ve gone through experimenting and prototyping I’m starting to build abstractions for myself. I’m doing this mostly to help me keep track of progress. As I learn a new technique, I can roll it up into some sort of generalized function, class, or method where I can re-use it later without needing to think through the entire implementation again.
This led me to creating a few basic structures for switching between “menus” or scenes. A concept of a Scene isn’t referenced in pygame documentation. It was just a concept that was easy to wrap my head around and that I saw used in Unity.
Follow along
I put up a sample program (in a simple script) as a gist so that you can see a working sample of what I’m talking about. Keep in mind that the code won’t perfectly line up since it’s been condensed into a single file.
A handful of directories/files come from dependencies that I’m working with. See the dependencies below which use the venv, Pipfile, and Pipfile.lock files.
Outside of that, it’s a pretty simple setup:
assets holds static assets like images (.png) or sound files (.wav). Down the road this may also store any static data, if I need json structures for example.
supercargo is the main project code. I don’t have a project name yet, so picked something unique to prevent module conflicts.
main.py is the main startup script. I run the game by running this file.
README.md is notes and documentation for the project.
Dependencies
I’m starting the project using python 3.8 and pygame 2.*. I’m using pipenv. I also run everything in a virtual environment which is why you see the venv directory.
Workflow
There is a lot of back and forth with the CLI since pygame has no GUI editor.
I don’t mind this, especially while learning, coming from the web dev world. I already spend the majority of my time bouncing back and forth between editor, shell, and browser.
With this project, I’m essentially just bouncing back and forth between editor, shell, and game window, using $ python main.py to run a game.
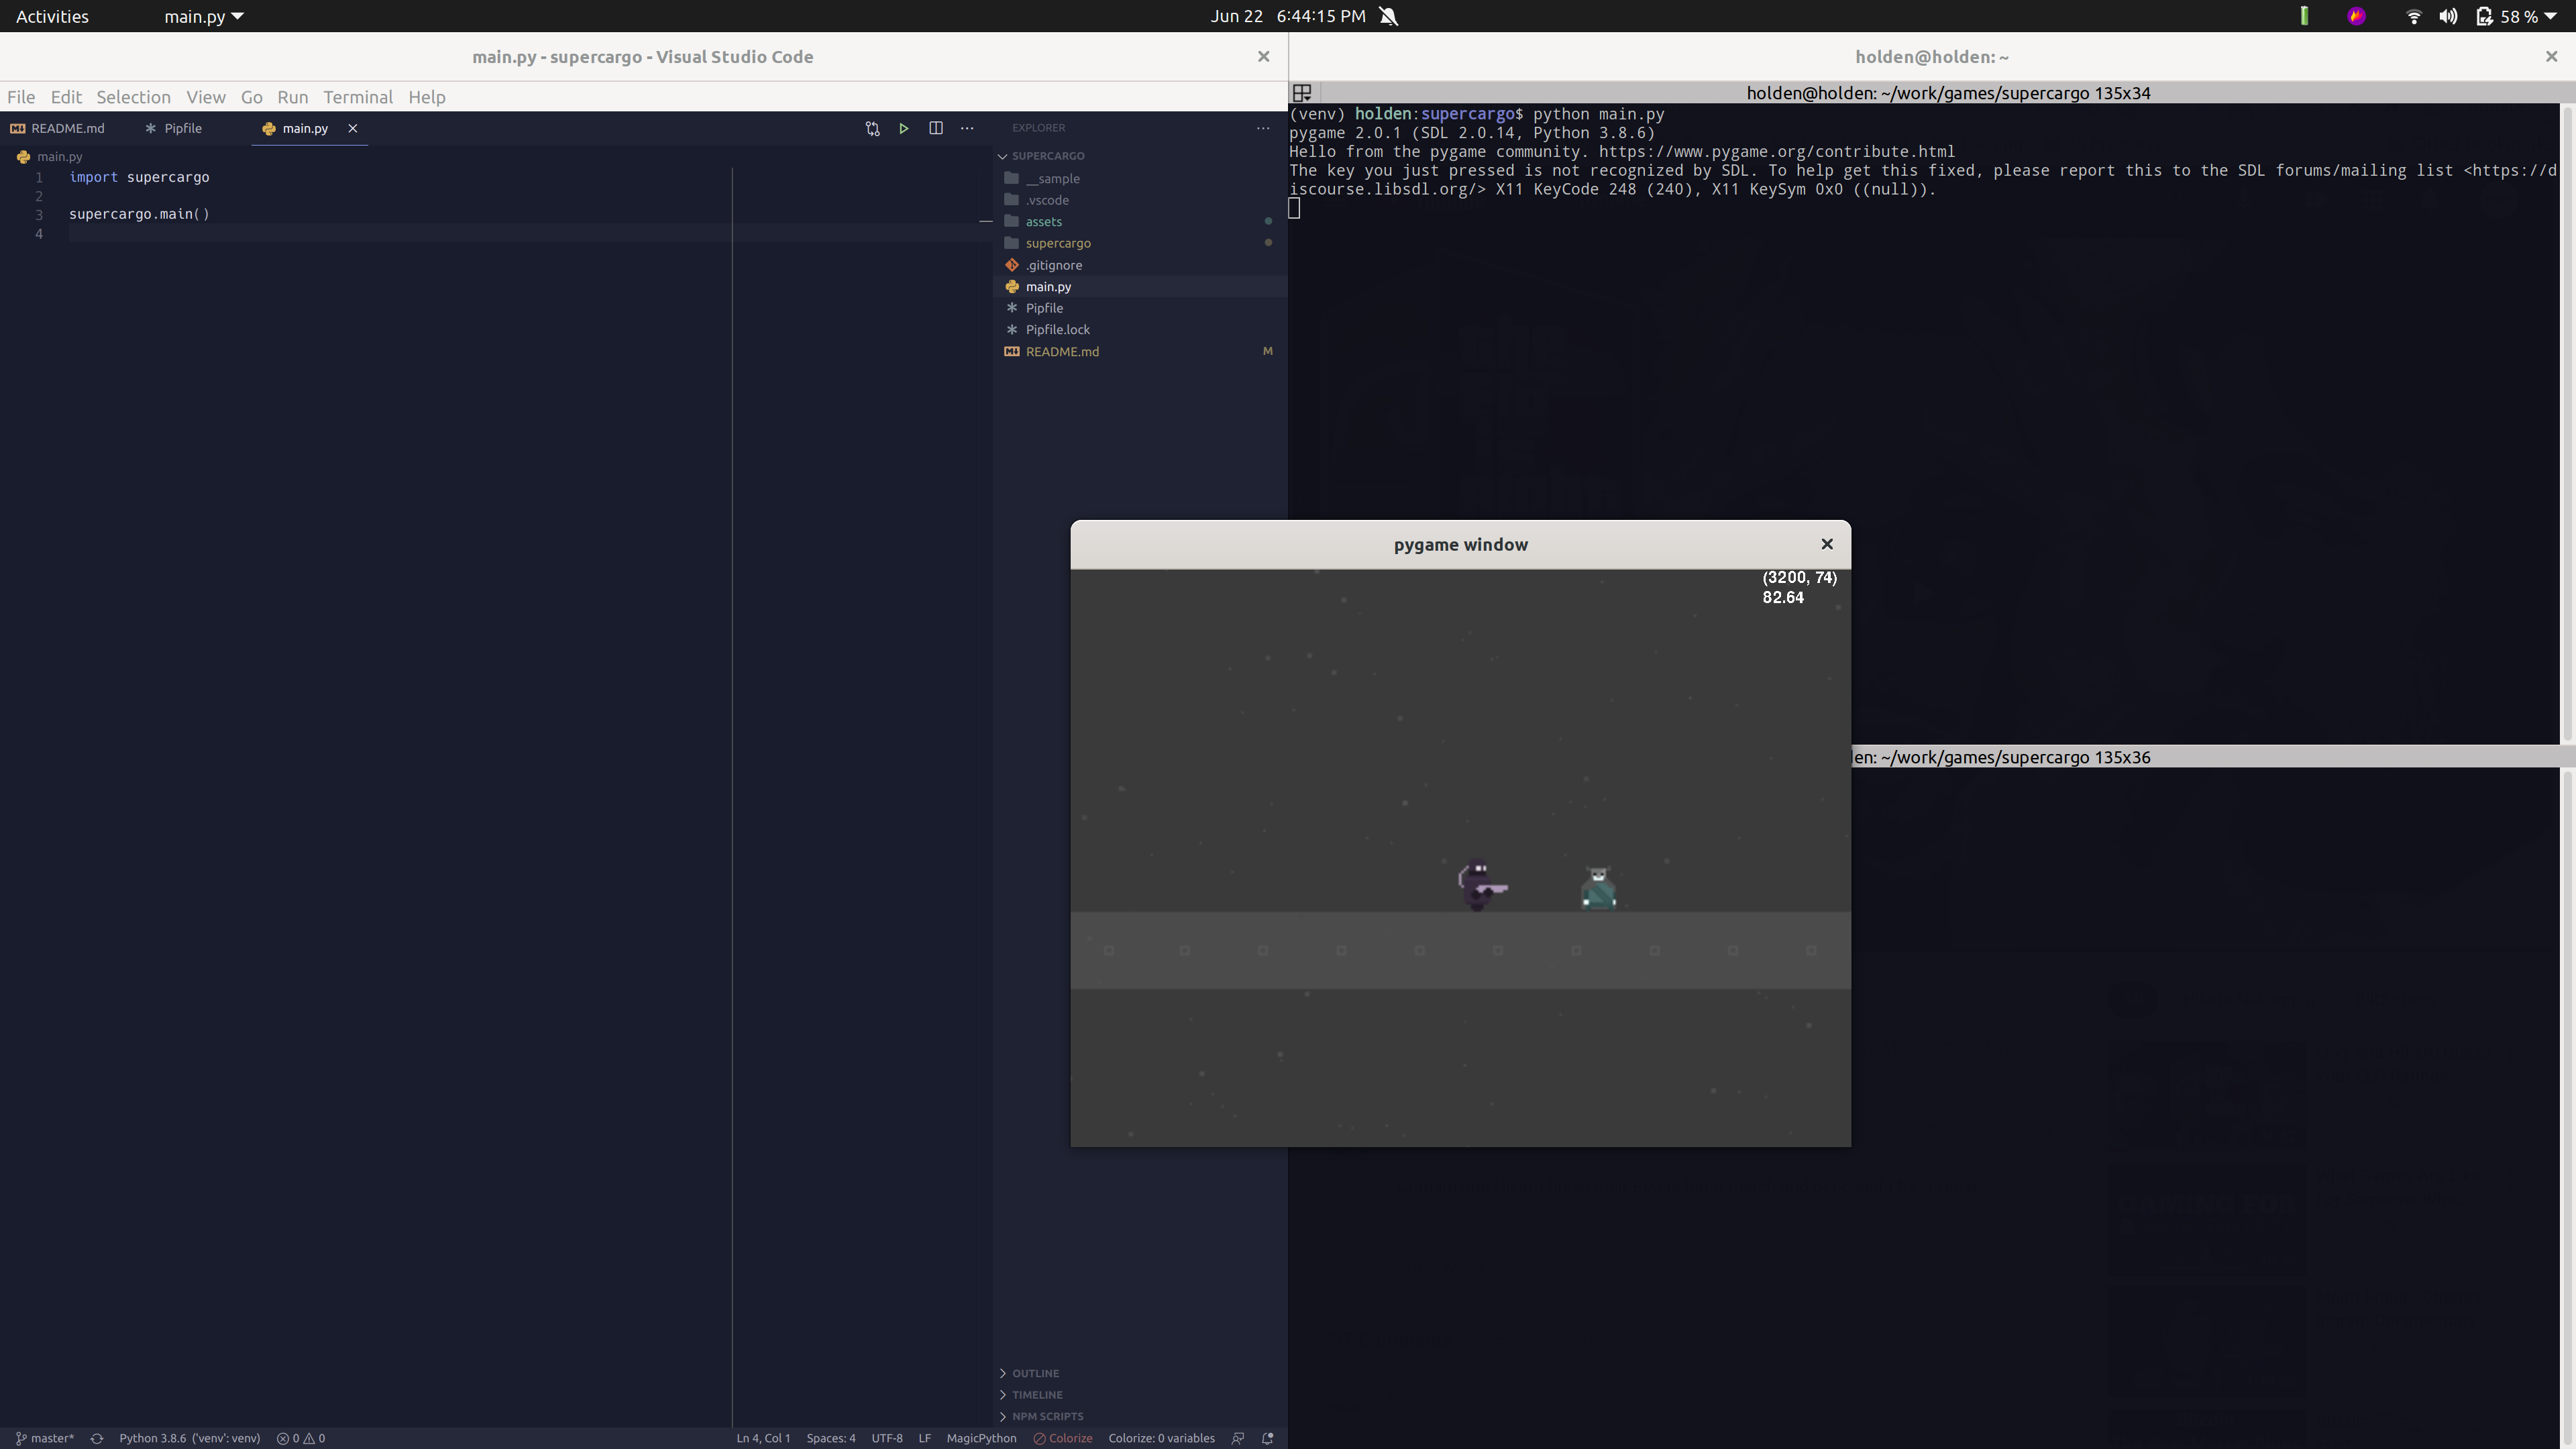
An example of another protoype I’ve worked on.
Initializing the game
Here’s what the initialalization of the application looks like:
# /main.py - entry point to the game
importsupercargosupercargo.main()
Setting up a global current_game variable. This is mimicking the pattern that Flask uses for its current_app global variable. This prevents complicating code by passing around a game object, or session object, or state object. The creator of Flask explains why he chose this pattern here.
Using the pattern this way means that it’s simple to access anything from the game object, where we will store all sorts of useful information, via importing with from supercargo import current_game.
Defining a “scene loop”. This is where things got slightly more complicated than I would have liked. Here we have a loop that is checking for a Scene object to run. When there are no more scene objects, the game ends. As I mentioned above, a scene may be a menu or it may be gameplay. In our code here, we are jumping right into the MainMenuScene. A main menu would typically have buttons to start a new game, restore a save, open options, etc. For now, I’ll keep it simple for the sake of prototyping.
Alright, that’s the gist of how the application is initializing and booting, but I still need to fill in some gaps.
The Game object
pygame leaves it up to you to keep track of all of the moving pieces of your game. I needed to create an object where I could centralize parts of the application that are important or consistently accessed by across the entire application. A game configuration would be a good candidate for this.
To start, the Game class is straight forward. It has a clock which will be used once we implement our game loops, the next_scene property to store which scene to run next, and a screen object.
Display’s and screen rendering is a decently complicated topic that I’m still working through too, so I’ll have to get into that more later. For now you just need to know that pygame.display.set_mode creates a new Surface object. We can manipulate that Surface by writing text or images to it for example.
The Scene objects
And now the Scene. You saw in the main function that we are calling run() on the scene objects to enable them or to effectively switch between scenes. That’s going to be our main entry point, but there are a couple other interface methods as well:
# /supercargo/engine/scene.py
importabcclassScene(abc.ABC):running=True@abc.abstractmethoddefplay(self):...defrun(self):fromsupercargoimportcurrent_gameself.running=Truewhileself.running:foreventinpygame.event.get():ifevent.type==pygame.QUIT:self.quit()try:self.play()exceptExceptionase:traceback.print_exc(e)self.quit()current_game.clock.tick(60)# frames per second
pygame.display.flip()# render the display
defquit(self):self.running=False
The base scene object provides a hook called play which each scene will implement. play is the meat of the functionality in the scene. It’s run once per frame, which you can see in the run method. The run implements a game loop, looks for a quit event (user closes the game window), runs the scenes’s play logic, ticks the game clock forward, and updates the display.
Let’s look at two concrete implementations of scenes:
# /supercargo/scenes/main_menu_scene.py
importpygameimportsupercargofromsupercargoimportengineclassMainMenuScene(Scene):def__init__(self):self.frames=0defplay(self):"""
Count down from 5 to 0, and once the timer hits 0 we start the game.
"""fromsupercargoimportcurrent_gameself.frames+=1countdown=max(5-round(self.frames/60),0)ifcountdown>0:current_game.screen.blit(pygame.font.SysFont(None,80).render(f"Game starting in {countdown}",False,(255,255,255)),(5,5),)else:self.quit()current_game.next_scene=supercargo.scenes.GameplayScene()
# /supercargo/scenes/gameplay_scene.py
importpygamefromsupercargoimportengineclassGameplayScene(Scene):defplay(self):fromsupercargoimportcurrent_gamecurrent_game.screen.blit(pygame.font.SysFont(None,60).render("Welcome to the game.",False,(255,255,255)),(5,5),)
These are about as simple as you can get when it comes to a menu and a main game scene. The idea here was to avoid adding extra complexity like keyboard input and events, so the Main Menu starts a count down timer and when that timer hits 0 it starts the game scene. It proves the point for a sake of a prototype to show how you can switch scenes.
The game now looks like:
You can imagine how the MainMenuScene could eventually add multiple buttons rendered to the screen where a function is called when those buttons are clicked. There could be a button for Play, a button for Quit, and a button for Options for example. Then the GameplayScene could render a character to the screen, hook into keyboard inputs to move that character around, and lots more from there.
Some final notes
Here’s some final notes on specific functionality happening in this little prototype or general thoughts going forward.
blit
All of the rendering is very explicit. You can see in the sample scenes that to put text on the screen you need to define the exact x, y coordinates along with any meta data like color:
I’m setting a random, default screen size of 600/400 so the window starts fairly small. I know that there are some techniques that can be applied for better window rendering. For example, defining two internal screen objects. One with the proper resolution of the game and then another that represents the actual size of the window. Then as the window is resized, the inner screen can be scaled up to the container screen.
nesting scenes
With the method shown, it’s possible to kill the current scene and switch. I wanted to prevent extra data hanging around in memory. Avoiding complex, nested, semi-infinite while loops seems obvious.
But at the same time, it is also possible to do that on a small scale. I think there’s a use case for something like a Pause scene. This means that when the main gameplay “switches” to a pause scene then it’s going to stop the gameplay. That’s ideal for a pause screen.
…
That’s it for now. I plan to keep working through techniques and ideas to build a more complete prototype. I’m thinking about moving on to movement systems and then simple combat systems.
I’ve written software since 17 years old, not counting odd programming-esque things growing up like altering programs on a graphing calculator or little drag and drop logic builders.
Despite being around tech for 10 years, I haven’t explored game development unless you count a handful of frustrating days looking at Unity. I think I’ve tried to build something in Unity a dozen separate times. It never clicked.
Surprise. Things still have not changed for me with the big engines.
This month I tried diving in again. The usual suspects have popped up. Unity, Godot, and a handful of other open source and non open source systems to build games. Again, these bigger engines and libraries did not even begin to click after a few days of experimenting.
Writing software can have a special kind of way to make us feel like idiots (and then we desperately try to hide those feelings from our coworkers) but game development for me has gone above and beyond with making me feel like an idiot. I do understand game dev has its own universe of specialized technologies and techniques, but I expect that to be capable of wrapping my head around coding a simple map with a movable character.
I’m coming from a web dev background. I’ve built web sites and applications in one form or another since I started programming (with WordPress back in 2011 in all its glory). I’ve moved through a variety of frameworks, languages, and toolsets since but the last 5 to 6 years have been focused on Python.
So naturally I’ve also run across pygame. Using pygame throughout the last week has been an entirely different experience. The framework is more explicit and maybe more cumbersome compared to other tools of course, but I’m excited to use it to learn. Writing some of the logic for display rendering, handling sprites, simple physics, etc. clears up the fog in my head. I’m going to use it to hopefully build multiple small projects or prototypes. As I get further into the game dev world, maybe even get something out to steam or itch.io.